Momofuku Milk Bar Compost Cookie

Last week, I talked to y’all about cookies, and my Fairy GodSista Jules sent me a message and said, “Hey Sarah – Have you ever tried these?” And I was like, “Um. No. But OH-MY-GOODNESS. I need to.” {And big ups to Jules to know that when you have a recipe like this under your hat, you SHARE it}

And so I spent days scheming the perfect combination of cookies.

And then I made them wrong.

Word to the wise, never shut down your computer thinking that the picture you took of the list of ingredients with your iPhone is enough to get you through.

BUT WAIT.

Even though I didn’t beat the cookies for the requisite TEN MINUTES (ohh yeah, you read that right), they were still delish if only just a little bitty bit flat, so… no harm no foul. AND, I have an excuse to try again. Once I go to the store and get more brown sugar because I was completely out last night and had to mooch from my neighbor – and she didn’t have enough – and yeah, then I was so distracted I didn’t blend the dough long enough, blah blah blah.

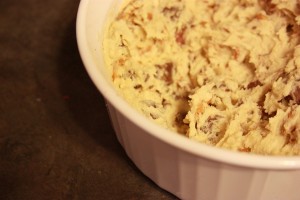
The Momofuku Milk Bar Compost Cookie is basically a chocolate chip cookie to which you add a bunch of stuff to it – not just ANY stuff. DARN NEAR ANYTHING.

The first batch? Rollos, chopped almonds and broken pretzel pieces.

Om nom nom nom. I won’t tell you how much cookie dough I ate (but it was A LOT).

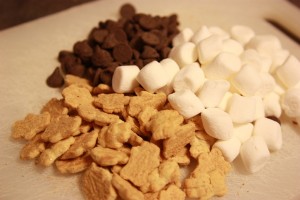
I split the dough in half and added some teddy grahams, marshmallows, chocolate chips for a S’mores inspired cookie. I also added chopped peanuts and rice crispies.

The end result (even though I DID NOT FOLLOW DIRECTIONS)? Supah tasty.

Plus, I get to make them again. Y’know… the right way.
Famous Pancakes Are Like, Totally Not Famous. But They Should Be.

Confession: I don’t really like pancakes.

If there was a war and on one side were the brave and gallant waffles and on the other side were the puny, wussy pancakes, well… Waffles would win every time. The flavor, the texture, those fun little waffle iron grid marks? Waffles are so completely full of win, and pancakes? Well, psh. Pancakes are just… flimsy, fleeting moments of breakfast that could be made better by SERVING WITH WAFFLES.

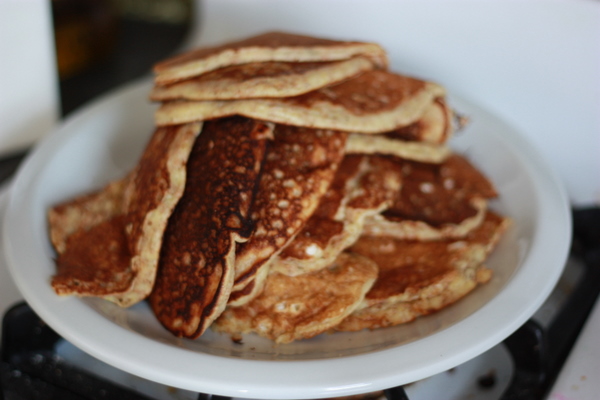
But, the exception to the rule is my dad’s pancake recipe. It’s a variation on a standard buttermilk pancake recipe, only it’s just AH-MAZE-ING, and even me, the pancake hater LOVES these.

According to my dad – the number one secret to good pancakes is a HEAVY skillet heated at about medium til a few drops of water tossed in the pan will “ball up” and skitter around the pan like little marbles. It takes a few minutes to get it to this temp, so get the pan started early, while you’re getting your stuff mixed together.

INTO A MIXING BOWL PUT:

  • 2/3 cup flour
  • 1/3 cup wheat bran
  • 1 heaping tbsp corn meal (you can leave it out – but it’s SO GOOD with)
  • 1 heaping tbsp cream of rice (again, this is optional, but seriously… add it)
  • 1 tbsp sugar
  • 1/2 teaspoon salt
  • 1 teaspoon baking powder
  • 1/2 teaspoon baking soda

and stir it all up really nicely til it’s mixed the way you like it.

THEN.

IN YOUR BLENDER JAR PUT:

  • 2 eggs (or 1 egg and up to 2 or 3 egg whites — it’s a protein thang)
  • 1 cup buttermilk (lowfat is a-okay)
  • 2 tablespoons vegetable or canola oil (or butter, BUT NOT MARGARINE. Dad says it’ll clog your veins and make your circulatory activities more difficult in years to come, and I’m gonna listen to him)

Whirl it around until the color is uniform.

NOW.

Pour the liquid from the blender into your mixing bowl and mix until JUST blended.

OKAY, HERE YOU GO.

Film the frying pan with vegetable oil, says my dad. I say cooking spray works just fine. Pour about 3 tbsp of batther from the tip of a spoon or pitcher into the hot skillet. If you stop here, you’ll only have one pancake so… repeat until you just can’t repeat anymore.

They’re ready to turn when bubbles have formed on the top – almost the entire surface will have bubbles – and the other side cooks in about half the time.

And finally, if you’re gonna use syrup, make sure it’s the REAL stuff.

***

“If you screw up, you can sometimes learn just as much from the experience… but you have to be willing to laugh about it for years and have oatmeal for breakfast.”
-My dad

Crunchy French Toast with Chocolate Filling

Here is a minor food confession that will either leave you utterly appalled by my lame palette, or… yeah, you’ll pretty much just be appalled: I don’t like eggs.

Oh, yeah – I love eggs when they are blended up to make a cake, or cookies, or even a nice loaf of gingerbread. Yes. Scrambled eggs? No. Hard boiled eggs? Uh uh. Omelets? You had to ask? No. So, when I’m doing breakfast, I happily focus on my beloved carb family. Waffles? Ohhhh yeah. Bagels dripping with melted butter? Yes please. French toast? Here’s my plate, pile it on.

For awhile, my French toast repertoire has been pretty solidly focused on a crunchy french toast recipe I have that is an oven-baked french toast coated with cornflake crumbs. The other day while I was driving, though, I thought about how when I was little if we baked and had leftover chocolate frosting, we used it as a “sandwich spread” of sorts on graham crackers. (If you’ve never tried it, you should. And then you better think twice about insulting my egg-hating palette, because I will have just redeemed myself).

I had chocolate on the brain, you see… so I started thinking about chocolate in my french toast.

AW YEAH.

It was phenomenal. It was just the right touch of sweet. AND, it made the use of maple syrup (which is a sticky mess) totally unnecessary.

(Now you’re probably thinking, “ENOUGH ALREADY! Get to the recipe!” So I will. Here you go!”)

Ingredients:
2 cups cornflake crumbs
1 loaf French bread
3 eggs
3/4 cups milk (I use fat-free because that’s what we have)
1 tsp vanilla extract (the real stuff – don’t use the fake stuff. EVER)
3/8 tsp salt (Just use the 1/2 tsp and don’t fill it up all the way – French toast is forgiving)
Chocolate spread
1/2 cup melted butter

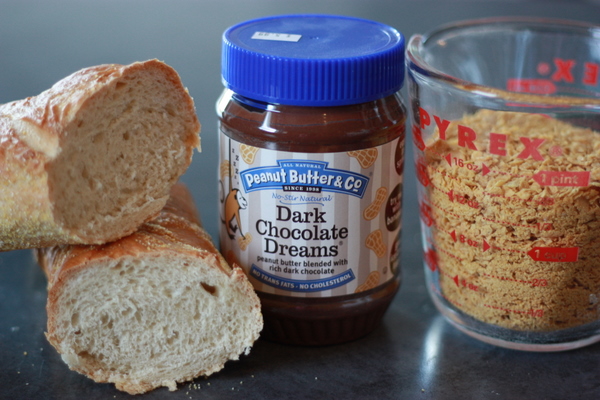
I only had a smidge of Nutella left, and subbed the remainder of the recipe with this Dark Chocolate Peanut Butter. Both were good, but... Nutella was SO MUCH NOMMIER.

1. Squish your cornflakes. How fine you squash them is a matter of personally preference. You can pulse ’em in the blender for a super fine crumb. I like them a little bigger, so I put the cereal in a bag and squoosh them with a rolling pin. Pour your cornflake crumbs into a shallow dish. [Note: Right about now, you’ll want to start preheating your oven. 450 degrees, please.]

2. In another shallow dish, mix together your eggs, milk, vanilla and salt. Be sure you’re not using fake vanilla. If you use fake vanilla the terrorists win (Also, your food won’t taste as good. Really).

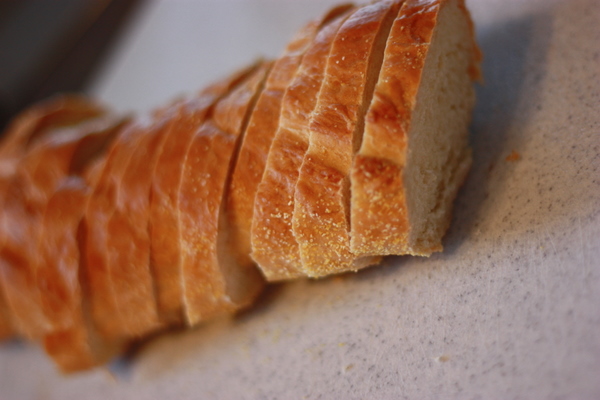
You'll want to slice your bread roughly 1/4" to 1/2" thick.

3. Slice your bread. I like to slice it about 1/4″ thick – but you don’t get graded on precision here. Just do your best. Slice an even number, though – you’ll be pairing them up in step four.

This is easy, right? You've made sandwiches before.

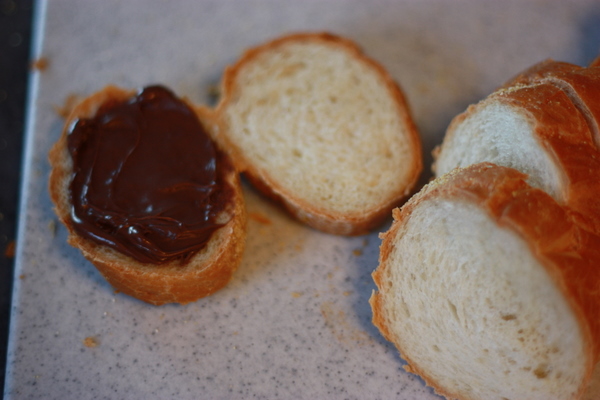
4. Smear the chocolate spread on one side of a slice of bread and then stick ’em together. Yeah, sandwiches! You’re making sandwiches! I will say again – the Nutella really makes for an amazing breakfast. It lends more of a “pain au chocolat” feel to the final product than the chocolate peanut butter does. Both are good, but… Nutella.

5. Put each sandwich first in the egg mixture (coating both sides) and then the cornflake mixture (coating both sides) before placing in a baking pan that you’ve sprayed with the nonstick cooking spray of your choice. Repeat this step until all your sandwiches are soggy and happily cornflake coated.

6. Drizzle your melted butter over all the slices.

7. Put in the oven and bake at 450 degrees for about 15 minutes or until golden on top.

This works great with a small sprinkle of powdered sugar on top. Be careful, that chocolate in the center gets HOT while baking, so you’ll want to try to resist eating it STRAIGHT OUT OF THE PAN (Learn from my mistakes, folks).

Sigh. Chocolate. For breakfast. I may be the best mom ever.

Life Is Just Better When There’s Cheesecake.

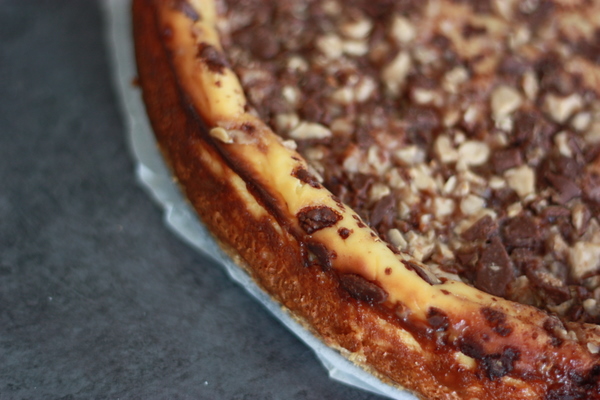
Heath Bar Cheesecake. OH YEAH.

I think it’s safe to say that most of you who have stumbled around this blog before know that I am less-than-skilled in the whole “preparing meals” department. There are some things I cook really well (seriously, I make some pulled pork tacos that actually make me look forward to the next several days – because it’s so good I’ll even eat leftovers!), but for the most part I don’t find much joy in the cooking process.

Baking, on the other hand…

I’m pretty good at baking.

For our family mother’s day gathering yesterday, my cousin sent an email requesting our presence with a note: Hey Sarah, could you bring dessert? *wink wink*

OF COURSE I CAN.

I brought this Heath Bar Cheesecake, and the recipe can be found here. It’s totally fabulous – and this is the second time I’ve made it and the family DEVOURED it. And that made me tremendously happy. Cheesecake is definitely best if you let your cream cheese sit out to soften before mixing. I used neufchatel instead of full-fat cream cheese, and couldn’t discern a difference – though with cheesecake, really? Go big or go home.

DELISH.

I Made Caramel French Toast And Now I’m Queen of the World

Or, y’know, just… Queen of the house.

My friend Rachel does this awesome thing on Mondays – Mouthwatering Monday – where she posts a recipe and a picture that makes you curse your own lack of culinary ability and marvel at the ease with which she flexes her culinary-know-how-muscles and whips up these awesome meals for her family…ALL THE TIME.

Well, I hate cooking. Sometimes, I get into it and get excited about making something new – but, y’all know – I’d rather bake than cook ANY DAY.

This recipe from Cooking Light magazine kind of allowed me to combine the two – technically, it’s cooking but really, it’s baking. Overnight Caramel French Toast was an absolute hit in my house – and the leftovers (which I had for breakfast this morning) were every bit as tasty as the day-of meal.

(I’d post pictures but, lemme tell ya: Caramel is NOT photogenic. Caramel is shiny. And every time the flash hit the caramel, the picture looked like hooey. Which is why I am a baker and not a food photographer, I suppose).

INGREDIENTS:
1 cup light brown sugar
1/2 cup light-colored corn syrup*
1/4 cup butter
cooking spray
10 (1-oz) slices French bread
1 1/2 cups 1% Low-fat milk**
1 tbsp all purpose flour
1 1/2 teaspoon vanilla extract
1/4 tsp salt
2 large eggs
2 tbsp granulated sugar
1 tsp ground cinnamon

1. Combine light brown sugar, corn syrup and butter in small saucepan and cook over medium heat five minutes or until mixture is bubbly. Pour mixture evenly into 9 x 13 pan that has been coated with cooking spray.

2. Arrange bread slices in single layer over syrup in dish.

3. Combine milk, flour, vanilla, salt and eggs in a large bowl and beat with a whisk. Pour egg mixture over bread slices.

4. Cover and refrigerate 8 hours or overnight.

5. The next morning… Preheat oven to 350 degrees.

6. Combine granulated sugar and cinnamon and sprinkle evenly over bread.

7. Bake at 350 for 50 minutes or until golden.

8. Let five minutes before serving.

They say this should serve 10… That depends – I used more than 10 slices of bread because I had room in my pan, and honestly… maybe I had two pieces versus the recommended one piece serving (c’mon Cooking Light – this is like the yummiest fresh baked goods for breakfast). And if I’d have had bacon, I’d have served some to cut a little salt in with the sweetness.

There you go – ENJOY. Invite me over for breakfast when you make this, alright?

* I ran out of light corn syrup and used a mixture of light and dark – it was fine
**I used skim milk. It was fine.