Double Double Chocolate Chocolate Biscotti Biscotti

I love a biscotti. I love dunking them in my coffee or eating them solo. I love that it wipes out a cookie craving and I never get the urge to eat the whole pan in one sitting (okay, hardly ever). And because they aren’t filled with oil and butter and all that gobbledy-gook, they’re not horrendous for the waistline. BONUS.

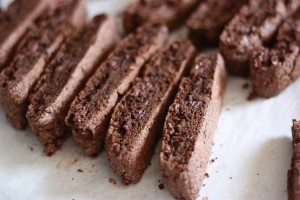
If you’re like many people, you might think that biscotti is just a fancy Italian way of saying “overpriced crunchy cookie from Starbucks” – but what biscotti really means is twice baked cookie. And literally, that’s what it is. You shape your dough into a loaf, bake. Then slice and turn and bake again. These look complicated, and you can make them look super fancy (dunking them into melted white chocolate or adding a nice drizzle to the top of the biscotti), but you can make these for a fraction of what you pay at the coffee places. They’re not that hard and it makes you look fancy.

This recipe is from Cooking Light – and if you aren’t reading it, you should. I love seeing some of my favorites slimmed down so they aren’t as rich or destructive to my health. And these? DELICIOUS. I love this recipe as is, but wouldn’t mind jazzing things up with some toasted almonds, maybe? Walnuts. PEANUT BUTTER CHIPS. The sky is the limit.

1 1/2 cups all purpose flour
1 cup sugar
1/2 cup unsweetened cocoa
1/2 cup semisweet chocolate chips (regular or mini)
1/2 tsp baking powder
1/2 tsp baking soda
1/2 tsp salt
1 tsp vanilla extract (THE REAL STUFF, remember? None of that imitation nonsense)
2 large eggs
1 large egg white
Cooking spray

1. Preheat the oven to 350°.

2. Combine dry ingredients into a medium bowl, whisking together. In a large bowl, mix the wet ingredients together. Add the dry ingredients to the wet, stirring until well blended.

3. Divide dough in half. Turn dough out on cookie sheet covered in cooking spray (OR use parchment paper, like I did). With floured hands, shape each half into a 12″ long roll patting to ½” thickness.

4. Bake for 22 minutes. Remove from baking sheet to cool for ten minutes. Cut each roll into 18 slices (ish). Stand slices upright on baking sheet and bake an additional 15 minutes until firm.

Biscotti will be slightly soft upon removing from oven, but will harden as it cools.

Now pour yourself an awesome cup of coffee, grab a biscotti, and dunk. Ahhhhh.
Know What’s Better Than Donuts? DONUT CAKE

This fall during a spell of Pumpkin deciding that sleep was TOTALLY optional, I made a deal with my daughters: If you are great sleepers all week, on Friday morning we’ll go out for donuts. Yeah, I know, I know – bribing with food… not the best idea (but, I ran into my doc at the grocery store with her son one time – buying HIM a donut for the same reason – because even she knows that kids who sleep are happier and more well rested and so is their mom).

Thus, our Friday tradition was born. Every Friday morning we wake up, get dressed and go out for donuts. If it’s the school year, we time our venture so that we can go right into drop offs after we chow. In these lazy summer days, we get our donuts (I don’t get a donut – I just get a cappuccino bigger than my head) and wander on home.

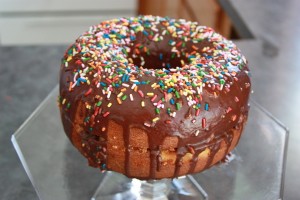
The other night I was browsing the Williams-Sonoma website (as I do) and stumbled across their donut cake pan. The next morning I was still thinking about it – so I bought it. Fortunately for me, Pumpkin decided she wanted a donut cake for her birthday party this weekend and so it was a TOTALLY JUSTIFIED PURCHASE.

And the cake recipe on the box that accompanied the cake? Pure joy. Tastes like a cake donut. Next time around? I want to add some lemon zest – it was perfect without – but I think a little bit of the tart lemon juice and zest will add a little somethin’-somethin’ to make this cake even more fab. Or, oooh, orange – I love chocolate and orange together like that… Or perhaps? Swap almond extract for vanilla?.  The possibilities are limitless – but even as is, it’s DIVINE.

So, here we go.

CAKE STUFF:
3 cups all purpose flour
2 tsp baking powder
1 1/2 tsp salt
1 1/3 cup milk

1 1/2 tsp vanilla extract
16 tbsp (2 sticks) unsalted butter
2 cups granulated sugar
4 eggs, lightly beaten

How you do it:

1. Put your ingredients at room temp, lower at least one rack to the lower third of your oven. Preheat to 350°F. Grease and flour both halves of your donut pan [That is, if you bought the donut pan. I think this would work pretty darn well in a bundt pan – but… it wouldn’t look like a donut. That’s okay with me if it’s okay with you]

2. Sift together flour, baking powder and salt in a small bowl. In another small bowl, combine the milk and vanilla. Set both bowls aside for now. We’ll find them again later.

3. In the bowl of your mixer, beat the butter on medium speed ’til smooth and creamy. Add granulated sugar and continue to beat until your mixture is light and fluffy – roughly five minutes-ish. Add the eggs, beating well after each addition.

4. Reduce speed to low and alternate adding flour mixture and milk mixture to your creamed sugar/butter mix. Stop the mixture occasionally to scrape down the sides of the bowl.

5. If you’re using the donut pans, divide your mixture evenly between the two pans, tapping the pans gently on the counter to get rid of any air bubbles. You’ll want to spread the batter slightly up the sides so the sides are higher than the center. Bake until a toothpick inserted in the center comes out clean – about 40 – 45 minutes.

If you’re using the donut pans, definitely check the instructions on how to assemble your spiffy little donut.

FOR THE GLAZE:

5 tbsp unsalted butter
4 oz semi-sweet chocolate chips
1 1/4 cup powdered sugar
1 1/2 tsp vanilla extract
1/4 cup hot water

What to do next:
1. Melt together chocolate and butter (the directions said to use a double boiler – I don’t have one! I fashioned a faux-double-boiler by putting a small glass bowl over a pan with an inch of water heating in it. I’m not saying my way is a great way. Or even a safe way. Or a way where you won’t burn your fingers. So, use caution).

2. Once the chocolate is melted, whisk in powdered sugar, vanilla, and water until smooth and combined. Pour it over the cake and decorate immediately with sprinkles.

3. Let set for about 15 minutes.

ENJOY. NOM. NOM. NOM.

Famous Pancakes Are Like, Totally Not Famous. But They Should Be.

Confession: I don’t really like pancakes.

If there was a war and on one side were the brave and gallant waffles and on the other side were the puny, wussy pancakes, well… Waffles would win every time. The flavor, the texture, those fun little waffle iron grid marks? Waffles are so completely full of win, and pancakes? Well, psh. Pancakes are just… flimsy, fleeting moments of breakfast that could be made better by SERVING WITH WAFFLES.

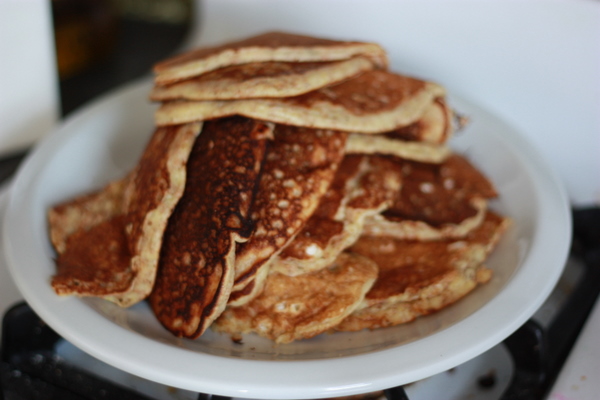
But, the exception to the rule is my dad’s pancake recipe. It’s a variation on a standard buttermilk pancake recipe, only it’s just AH-MAZE-ING, and even me, the pancake hater LOVES these.

According to my dad – the number one secret to good pancakes is a HEAVY skillet heated at about medium til a few drops of water tossed in the pan will “ball up” and skitter around the pan like little marbles. It takes a few minutes to get it to this temp, so get the pan started early, while you’re getting your stuff mixed together.

INTO A MIXING BOWL PUT:

  • 2/3 cup flour
  • 1/3 cup wheat bran
  • 1 heaping tbsp corn meal (you can leave it out – but it’s SO GOOD with)
  • 1 heaping tbsp cream of rice (again, this is optional, but seriously… add it)
  • 1 tbsp sugar
  • 1/2 teaspoon salt
  • 1 teaspoon baking powder
  • 1/2 teaspoon baking soda

and stir it all up really nicely til it’s mixed the way you like it.

THEN.

IN YOUR BLENDER JAR PUT:

  • 2 eggs (or 1 egg and up to 2 or 3 egg whites — it’s a protein thang)
  • 1 cup buttermilk (lowfat is a-okay)
  • 2 tablespoons vegetable or canola oil (or butter, BUT NOT MARGARINE. Dad says it’ll clog your veins and make your circulatory activities more difficult in years to come, and I’m gonna listen to him)

Whirl it around until the color is uniform.

NOW.

Pour the liquid from the blender into your mixing bowl and mix until JUST blended.

OKAY, HERE YOU GO.

Film the frying pan with vegetable oil, says my dad. I say cooking spray works just fine. Pour about 3 tbsp of batther from the tip of a spoon or pitcher into the hot skillet. If you stop here, you’ll only have one pancake so… repeat until you just can’t repeat anymore.

They’re ready to turn when bubbles have formed on the top – almost the entire surface will have bubbles – and the other side cooks in about half the time.

And finally, if you’re gonna use syrup, make sure it’s the REAL stuff.

***

“If you screw up, you can sometimes learn just as much from the experience… but you have to be willing to laugh about it for years and have oatmeal for breakfast.”
-My dad

Crunchy French Toast with Chocolate Filling

Here is a minor food confession that will either leave you utterly appalled by my lame palette, or… yeah, you’ll pretty much just be appalled: I don’t like eggs.

Oh, yeah – I love eggs when they are blended up to make a cake, or cookies, or even a nice loaf of gingerbread. Yes. Scrambled eggs? No. Hard boiled eggs? Uh uh. Omelets? You had to ask? No. So, when I’m doing breakfast, I happily focus on my beloved carb family. Waffles? Ohhhh yeah. Bagels dripping with melted butter? Yes please. French toast? Here’s my plate, pile it on.

For awhile, my French toast repertoire has been pretty solidly focused on a crunchy french toast recipe I have that is an oven-baked french toast coated with cornflake crumbs. The other day while I was driving, though, I thought about how when I was little if we baked and had leftover chocolate frosting, we used it as a “sandwich spread” of sorts on graham crackers. (If you’ve never tried it, you should. And then you better think twice about insulting my egg-hating palette, because I will have just redeemed myself).

I had chocolate on the brain, you see… so I started thinking about chocolate in my french toast.

AW YEAH.

It was phenomenal. It was just the right touch of sweet. AND, it made the use of maple syrup (which is a sticky mess) totally unnecessary.

(Now you’re probably thinking, “ENOUGH ALREADY! Get to the recipe!” So I will. Here you go!”)

Ingredients:
2 cups cornflake crumbs
1 loaf French bread
3 eggs
3/4 cups milk (I use fat-free because that’s what we have)
1 tsp vanilla extract (the real stuff – don’t use the fake stuff. EVER)
3/8 tsp salt (Just use the 1/2 tsp and don’t fill it up all the way – French toast is forgiving)
Chocolate spread
1/2 cup melted butter

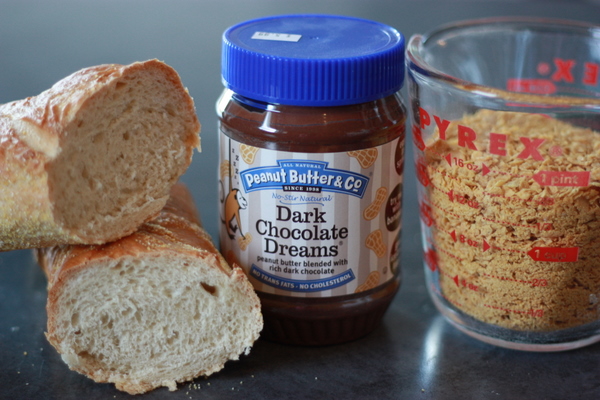
I only had a smidge of Nutella left, and subbed the remainder of the recipe with this Dark Chocolate Peanut Butter. Both were good, but... Nutella was SO MUCH NOMMIER.

1. Squish your cornflakes. How fine you squash them is a matter of personally preference. You can pulse ’em in the blender for a super fine crumb. I like them a little bigger, so I put the cereal in a bag and squoosh them with a rolling pin. Pour your cornflake crumbs into a shallow dish. [Note: Right about now, you’ll want to start preheating your oven. 450 degrees, please.]

2. In another shallow dish, mix together your eggs, milk, vanilla and salt. Be sure you’re not using fake vanilla. If you use fake vanilla the terrorists win (Also, your food won’t taste as good. Really).

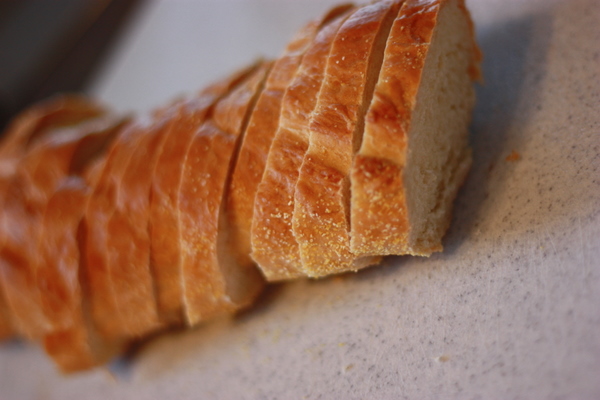
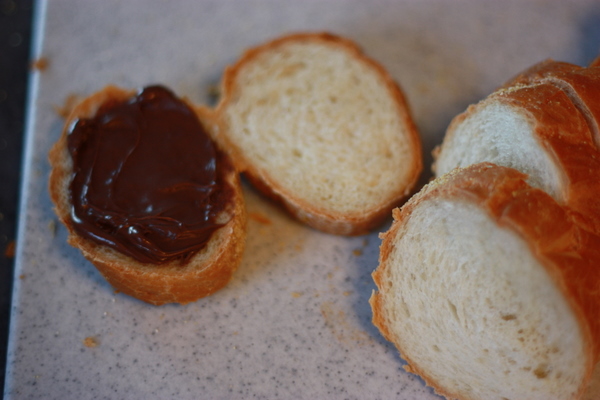
You'll want to slice your bread roughly 1/4" to 1/2" thick.

3. Slice your bread. I like to slice it about 1/4″ thick – but you don’t get graded on precision here. Just do your best. Slice an even number, though – you’ll be pairing them up in step four.

This is easy, right? You've made sandwiches before.

4. Smear the chocolate spread on one side of a slice of bread and then stick ’em together. Yeah, sandwiches! You’re making sandwiches! I will say again – the Nutella really makes for an amazing breakfast. It lends more of a “pain au chocolat” feel to the final product than the chocolate peanut butter does. Both are good, but… Nutella.

5. Put each sandwich first in the egg mixture (coating both sides) and then the cornflake mixture (coating both sides) before placing in a baking pan that you’ve sprayed with the nonstick cooking spray of your choice. Repeat this step until all your sandwiches are soggy and happily cornflake coated.

6. Drizzle your melted butter over all the slices.

7. Put in the oven and bake at 450 degrees for about 15 minutes or until golden on top.

This works great with a small sprinkle of powdered sugar on top. Be careful, that chocolate in the center gets HOT while baking, so you’ll want to try to resist eating it STRAIGHT OUT OF THE PAN (Learn from my mistakes, folks).

Sigh. Chocolate. For breakfast. I may be the best mom ever.

Life Is Just Better When There’s Cheesecake.

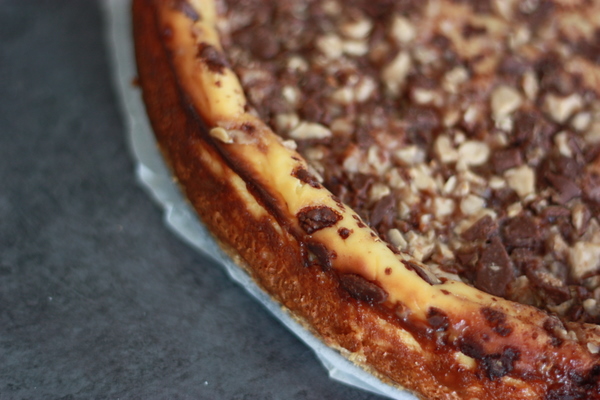
Heath Bar Cheesecake. OH YEAH.

I think it’s safe to say that most of you who have stumbled around this blog before know that I am less-than-skilled in the whole “preparing meals” department. There are some things I cook really well (seriously, I make some pulled pork tacos that actually make me look forward to the next several days – because it’s so good I’ll even eat leftovers!), but for the most part I don’t find much joy in the cooking process.

Baking, on the other hand…

I’m pretty good at baking.

For our family mother’s day gathering yesterday, my cousin sent an email requesting our presence with a note: Hey Sarah, could you bring dessert? *wink wink*

OF COURSE I CAN.

I brought this Heath Bar Cheesecake, and the recipe can be found here. It’s totally fabulous – and this is the second time I’ve made it and the family DEVOURED it. And that made me tremendously happy. Cheesecake is definitely best if you let your cream cheese sit out to soften before mixing. I used neufchatel instead of full-fat cream cheese, and couldn’t discern a difference – though with cheesecake, really? Go big or go home.

DELISH.

Five Minute Chocolate Cake

I saw this posted somewhere, I guess it’s also been circulating around the internet – well, I love chocolate, I figured I’d give it a whirl. This is one of those quick things you can make when you’re craving chocolate, but don’t want to go through the ordeal of a massive baking project.

In a coffee cup, mix the following ingredients:
4 Tbsp cake flour (or about 3 1/2 Tbsp regular old flour)
4 Tbsp sugar (I do a bit less than this and it’s fine)
2 Tbsp unsweetened baking cocoa
1 egg
3 Tbsp Milk (I use skim and it works fine, so I’m guessing it doesn’t matter)
3 Tbs oil
Small splash vanilla
Small handful chocolate chips (optional)

Stir well and microwave for three minutes – this time could vary depending on your microwave. The cake will puff up over the top of the cup – but once it’s out of the microwave, should deflate somewhat. This can serve two (face it, it’s not health food…) or one. I think it would go really well with a big scoop of vanilla ice cream (I don’t have any) or sprinkled with powdered sugar (I don’t have any) or topped with whipped cream (I don’t have any).

But, it’s yummy. And mine should have cooled off by now, so I’m gonna Publish this post and go eat my cake.

P.S. It’s ugly cake. Really ugly. So if yours looks funny, you’ve done it right.